
Anyway, I recently learned that those cheap ass foam craft shapes that they sell to keep kids occupied during the summer will work for making your own foam stamps and oh my gawd this was too freakin cool for words! I have literally thousands upon thousands of those damn things! I bought them a decade or so ago with the thought that my kids might like to play with them. Which they did, a little. Fortunately they did not enjoy them nearly as much as I had prepared for, so I have an almost limitless supply of precut shapes and blank sheets to use in making my own stamps! And boy did I make some stamps!


Of course, being as obsessive compulsive as I am, first I spent the better part of two days sorting and organizing all of those damn shapes! They are all now all neatly sorted into zip-lock baggies according to shape, so I can find what I want quickly and easily the next time I decide to do something with them. Once I finished sorting them I started adding glue and making the stamps. I just backed them with cardboard, because that is what I had to work with. They won't last forever, but I can always make more if they fall apart. Now I have 28 new stamps to play with, so I decided it was time to pull out my Gelli printing plate and start playing with them.


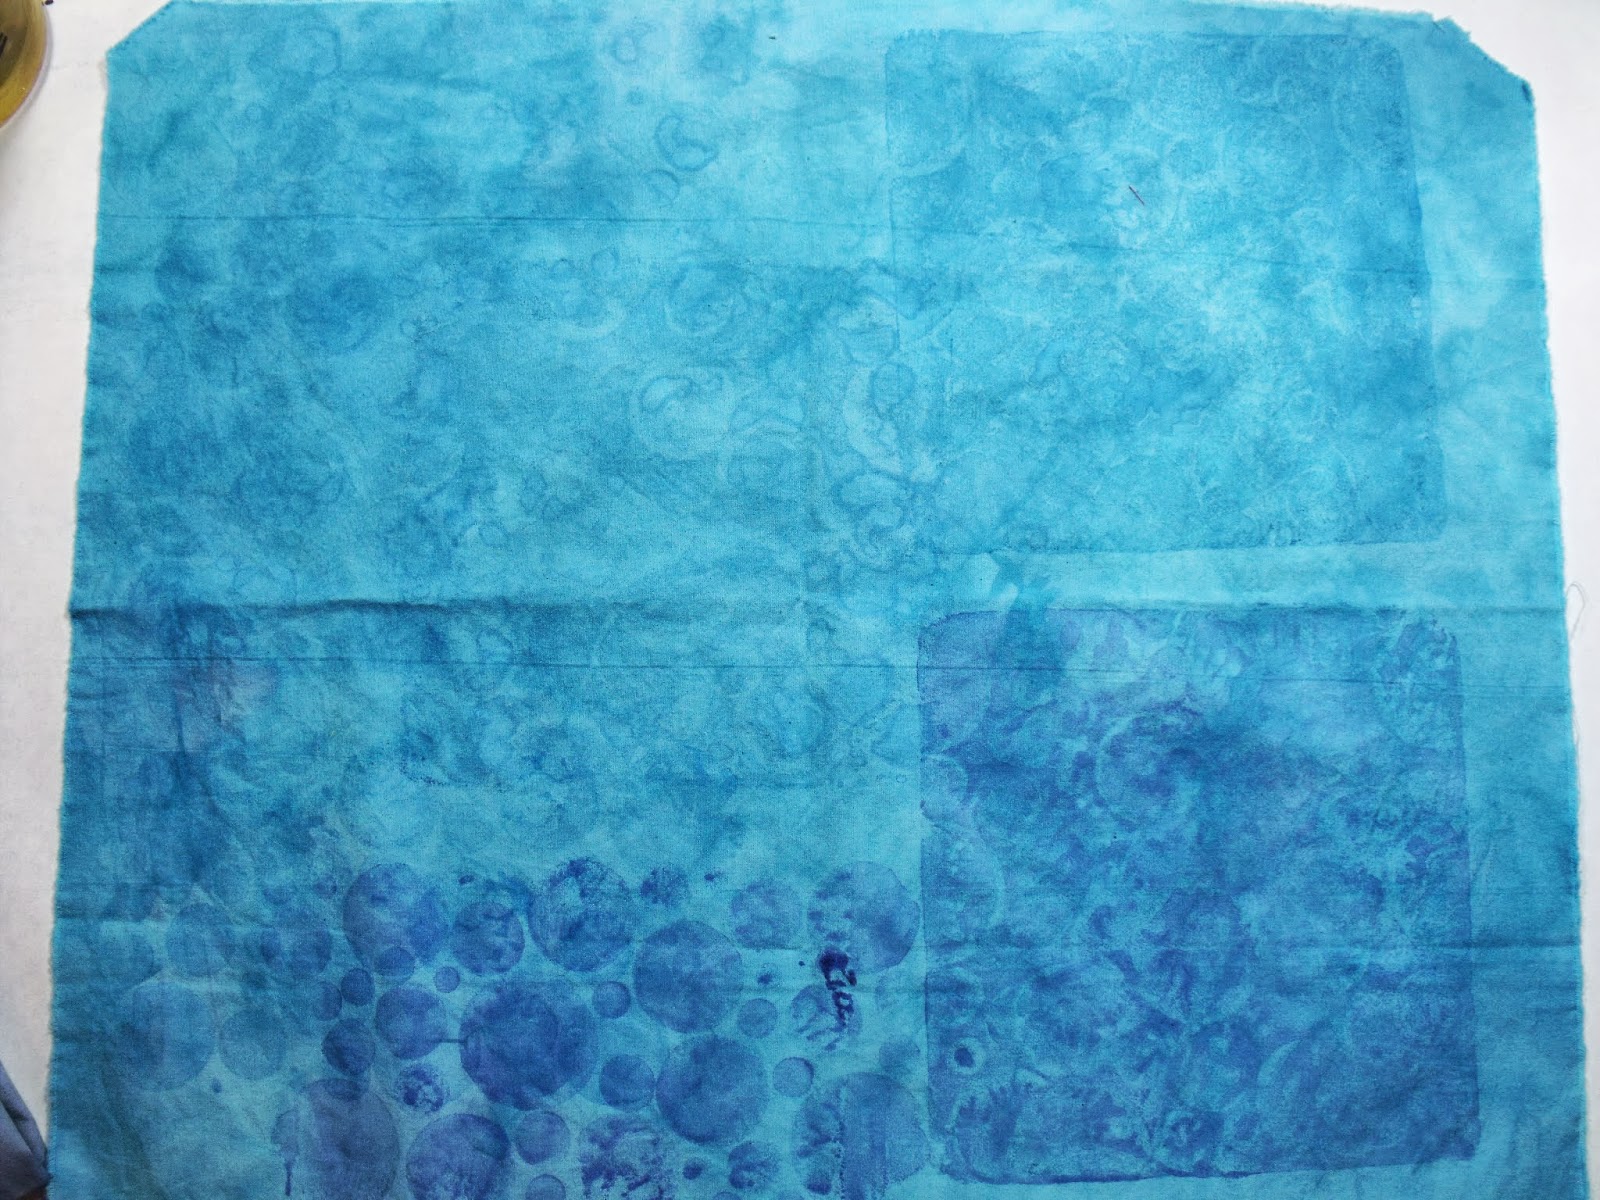
These two were done using watered down transparent paints and those foam stamps with the Gelli plate. I really like the textural effect of the circles in the bottom piece, especially from the printing plate part of the print. Now, if I had pulled out my stamping pad that I made before trying to stamp with those new foam stamps, that part probably would have worked a little better, but I was just testing, and I was too lazy to try to deal with all of that, and it worked out just fine anyway.
I have only had the plate for about a year or so, and of course I had never even opened it. I HAD to have it the moment I first saw it, even thought I had no idea why. I am sure glad I did. It was a lot of fun to play with! Of course, now I NEED a bigger one, but I think I can suffer through with my little one for a while longer. Especially since someone else mentioned that she uses the cheap plastic cutting boards to achieve similar effects to the Gelli printing plate. I will have to try that before I go shelling out $80 for another tool that will probably sit on the shelf for years.
 |
| Here is a photo of all of the products I was using in this Blog Post so you can see just what I am talking about. Top left is the Gel Medium, bottom left are some of the Transparent Paints, and on the right is the Gelli plate. |
I also tried a little bit of sun-printing, well, sunless sun-printing anyway, yesterday. I used my transparent paints and diluted the hell out of them, then I saturated a wet piece of fabric with the paint and then scrunched it up tightly into horizontal folds, and used my daylight lamp to expose the high spots to light and I ended up with a pretty cool looking piece of future sky or water fabric. I can guarantee I am going to be doing a lot more of that process in the near future!

Something else I tried yesterday that I plan on doing a lot more of (and I am actually in the middle of three more as I type) was learning how to transfer a laser printed image onto fabric. This was another new concept for me. I know how to use an ink jet printer to print on fabric, but you can't print directly on the fabric with a laser printer. Of course the only printers that I have access to that have actually ink in them are laser printers. Right now I am just working with Black and white images, I will try the color printer some other time.
So I learned a couple of weeks ago that you can use a gel medium to transfer the laser printed images to fabric, and the gel mediums that I ordered finally arrived, so I had to give it a try. I painted the medium generously all over the image (I am using the Vintage Women photos, like the ones I make the silly pictures from), and then carefully (haha) placed it image side down on the fabric. Then I took a scraper tool and burnished the back of the paper as thoroughly and completely as humanly possible, and waited for it to dry. Actually I couldn't wait, so I used my little heat gun to dry it, I probably should have just waited. Once it was all dry I spritzed water all over it, soaking the paper really well, let it sit for a minute, and then started rubbing the paper off. The one I did last night had a few little holes in the image that I think are a result of too little medium and not waiting for it to dry thoroughly, so for the three I am working on now I used a lot more medium, and I am letting them dry completely, on their own, before I try removing the paper. I will post picture of these when I get them done too. Here is the first one:

I kinda like the etherial look that this process provides. I have a couple of other processes and techniques that I want to try to add to this process, so be looking for lots of vintage women in our future here. I don't think I quite got all the paper off of this one. I will heat set the image with an iron later and run it through the wash to see what happens, hopefully that will help clean the image up a little bit more. Or it might wash it away entirely, can't really be sure until I try it. Either way I will let you all know what happens when I do.
Well, I think I am about ready to go remove the paper from the three pictures I attempted to transfer this morning so I am gonna sign outta here and get to playing some more. Until next time:

No comments:
Post a Comment